Monday, September 7, 2020

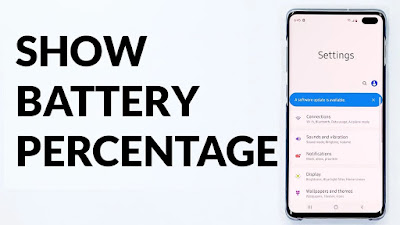
How to Show a Battery Percentage on Galaxy Note 20 Ultra

 If you are using the new Samsung Galaxy Note 20 or Note 20 Ultra then you might be knowing that by default the phone doesn't display battery percentage in the status bar. So if you want to 

see the battery percentage in the status bar on Galaxy Note 20 or Note 20 Ultra then you need to follow the below-mentioned steps: 

How to Get Battery Percentage in Status Bar on Galaxy Note 20 or Note 20 Ultra

How to Get Battery Percentage in Status Bar on Galaxy Note 20 or Note 20 Ultra

Step 1: Bring down the Notification panel from the top of the screen and then tap on the Settings icon.

Step 2
: Now, scroll down and then tap on Notifications.

Step 3: Next, tap on the Status bar. (By default disabled this option.)

Step 4: Turn ON Show battery percentage option.
 
Step 5: You can get the battery percentage icon in the status bar on your Note 20 Phone.
 
Step 6: Turn OFF Show battery percentage option to hide battery percentage.


How to Show or Hide Notification Icons from Status Bar on Galaxy Note 20 Ultra


By default, your phone displays the three most recently used notification icons in the status bar.YOu can also choose a number if you want to display all notification or 3 most recently used.
To do so follow the below-mentioned steps:

Step 1: First of all, go to Settings.

Step 2: Now, tap on Notifications.

Step 3: Next, tap on the Status bar. (Just make sure that show notification icon is enabled).

Step 4: At last, choose from the Number of notifications only/3 most recent/all notifications.

That's all!!

I hope you liked this step by step tutorial on how to show battery percentage on Galaxy Note 20 or Note 20 Ultra. If you are delighted with this guide, then I would also recommend you to
check the few most popular Galaxy Note 20 accessories.
Saturday, May 9, 2020

How to Get MAC Address of Amazon Echo Devices

Want to have MAC Address for Amazon Echo device? If yes then go ahead and read this step by step guide. Media Access Control Address is allocated to all the network devices and it is used as a network address for IEEE 802 technology which incorporates Ethernet and Wi-Fi. As an Alexa enabled smart speaker user it is very easy to find MAC Address for Amazon Echo devices.

To get the MAC Address of Alexa device you need to access Amazon Alexa on your smartphone or tablet and login into your Amazon Account.

How to Find the MAC Address of Amazon Echo Devices

Step #1: Open Alexa App or Launch alexa.amazon.com in your browser.

Step #2: Now, Go to Settings.

Step #3: Next, select your Alexa device.

Step #4: Tap on Update WiFi.

Step #5: On your Amazon Echo device, you have to press and hold the Action button. (Action button looks like a dot button so press and hold it until the light ring changes to orange).

Step #6: Once your mobile device is connected with your Alexa device, you will see a list of Wi-Fi networks in the app that is available.

Step #7: Select the WiFi network and go down until you find MAC address.


That’s it!

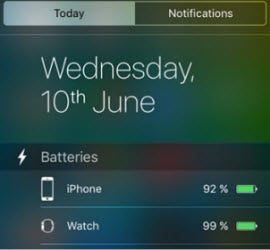
Battery Widget Missing in iOS 13 on iPhone and iPad? Here is a Fix

Today morning when I was trying to check the battery status of Bluetooth headphones on iPhone running iOS 13, I found that the battery widget was missing.

I don’t know what has happened and why the battery widget was not showing on iPhone? I did nothing yesterday expect updating iOS 13. So I think that after updating my iPhone to iOS 13 this battery widget got hidden or removed. I have also double-checked that my Bluetooth device is properly connected or not as even if you’re Bluetooth device is not connected then also you won’t be able to see battery widget in the notification center. So I dig into it and tried to get back the missing battery widget on iOS 13. And after some iterations, I was able to see the battery widget on iPhone running iOS 13.

So if you are also facing a similar issue then just follow the below-mentioned step by step guide without worrying.

Battery Widget Missing in iOS 13 on iPhone and iPad? Here is a Fix

Step #1. First of all, you need to access the lock screen by swiping right from left on the screen

Step #2. Go down and tap on the Edit button.

Step #3. Now, hit the red button which is located left to batteries widget, and then tap on Remove.

(Just in-case if you have not turned it ON, tap on the “+” button which is situated left to the battery widget under MORE WIDGETS. And then you need to tap on Done from the top right corner.)

Step #4. Next, tap on Done from the top right corner.

Step #5. Next Up, follow the same 1 to 2 steps and then tap on the “+” button from the left to the batteries widget and then touch and hold on the rearrange button.

Step #6: Tap on Done.

Just make sure that you have enabled battery percentage if not then go to Settings → Battery → Battery Percentage and enable it right away.

Step #7. Once you are done just reboot your iPhone or iPad.

Step #8. After your device is restarted, unlock your iOS device and go to the Lock screen now. You will see the battery widget.

If the battery widget is still not coming then reset your device by opening Settings → General → Reset → Reset All Settings.

You May Also Like:

Battery Widget Missing in iOS 14

Best iPhone 12 Pro Max Cases

Best Projector for iPhone

That’s all!! In most of the cases this workaround work like a charm. I have got the missing battery widget back just by following these steps.

Wednesday, May 6, 2020

How to Clear Cache on Samsung Galaxy S20, S20 Plus and 20 Ultra

Is your Galaxy S20 device freezing or crashing, screen not responding, slow down your phone, or getting a blank screen, then you can wipe cache out to fix. Clearing cache from Galaxy S20 device will not remove the App data or Phone data. It will simply delete unnecessary files, logs, and other junk files. So here in this guide, I will explain how you can wipe cache partition on Galaxy S20, S20 Plus, S20 Ultra

You can clear cache & data cache if you are facing any issue. The process of wiping the cache will temporarily delete app data. So let's get started.


How to Clear Cache on Galaxy S20, 20 Plus, and 20 Ultra


Step 1: Bring down the notification panel and then tap on the Power button.

Step 2: Now, tap on Power off. Once again tap on Power off to turn off your S20 Phone.

Step 3: Next, Press & hold the power key and volume up key at the same time until you see the recovery menu.

Step 4: Press the volume down button until you see the highlighted option Wipe cache partition.

Step 5: Press the power button and then press the volume down button to select Yes.

Step 6: Press the power key and wait until you see wipe all data message on the bottom left corner of the screen. Now, select the reboot system option.

Step 8: Press the power button.

How to Clear App Cache & Data in Samsung S20, S20+, S20 Ultra


Step 1: Open Settings and then tap on Apps

Step 2: Choose the app from the list.

Step 3: Now, tap on Storage.

Step 4: Next, tap on Clear cache (Remove all temporary data) or Clear data (Delete this app’s all data).


How to Clear System App Cache Galaxy S20, S20+, S20 Ultra


Step 1: Launch Settings and then tap on Apps

Step 2: Now, tap on three vertical dots (More) from the top right corner.

Step 3: Next, tap on Show system apps.

Step 4: Search the app and tap on it.

Step 5: Tap on Storage.

Step 6: Tap on Clear cache or Clear data.

That's it!! I hope that you are successfully able to wipe the cache partition on Samsung Galaxy S20. If you have any queries related to the Samsung S20 device, then post it in the comments section below. I will be happy to help you out.

You May Also Like to Explore:

Best WiFi 6 Router Under $200 (Galaxy S20 device Supports WiFi 6)

Sunday, April 26, 2020

How to Block a Number on Galaxy S20 Ultra, S20 Plus, and S20

Are you frequently getting calls and messages from unknown numbers on your Galaxy S20 device? If yes, then this guide will save you from all those annoying problems you are facing. In this article, I am going to show you how you can block a number on Samsung Galaxy S20, S20 Plus, and S20 Ultra.

Once you block a specific number on your Samsung S20, you won't receive any message or call from that contact. Moreover, you can also enable caller ID and spam protection on your Galaxy S20 phone to automatically recognize spam numbers and prevent the calls from disturbing you. 


How to Block or Unblock a Phone Number on Galaxy S20, S20 Plus, and S20 Ultra


There are two different ways you to block a private number calls on your Samsung Galaxy S20+ and other devices.


How to Block a Number/Contact using Phone App on Galaxy S20


Step 1: Launch the Phone app in your S20 Phone.

Step 2: Now, tap on three vertical dots (More).

Step 3: Next, select Settings.

Step 4: After that, tap on Block numbers.

Step 5: Here you have to add a phone number or you can choose from the Recents or Contacts list also.

Step 6: At last, tap on + icon to add a number to the block list.

From now onwards, you won't receive text messages and calls from this contact number. 


How to Unblock a Number on Galaxy S20 Plus, S20 Ultra, and S10


Step 1: Open the Phone app and then tap on Three vertical dots (More).

Step 2: Now, choose Settings.

Step 3: Next, tap on the Block numbers.

Step 4: Finally, tap on the “–“ icon to delete a number from the blocked list.


How to Block Contacts from the Recents list


Step 1: Launch the Phone app and then tap on the Recents tab.

Step 2: Tap on Contact Number from the list you wish to block.

Step 3: Now, tap on the information (i) icon.

Step 4: Next, tap on the Block button from the bottom right corner.

Step 5: Again, tap on Block.

Step 6: At any time if you wish to Unblock it, then you have to tap on the Unblock button.

That's all mate!!. I hope you will feel relaxed now as you won't receive any message and call from unknown numbers.

You can also check thecrazybuyers.com for genuine product reviews and Galaxy S20 accessories:


DIY Vs. Professional Screen Replacement for MacBook: Which is Better?

 The self-repair program for MacBook has made things easier for the users since you can fix most of the issues by yourself. However, when it...